Adding a Container
Note: In order to add or edit a container in IntelliTrack Mobile, the role of the logged-in user must include the Containers feature.
A container may be added to a location from IntelliTrack Mobile. A location may have an unlimited amount of containers. The following information is required when adding a container:
- Container name
- Site-location of the container
- Container type
Items Tab
You are able to add an item or items found in inventory to the container from Add Item to Container form, which is reached from the Items tab. This form contains a field Lock feature, which allows for rapid item data entry. This is an optional step.
Assets Tab
Additionally, if the role of the logged-in user contains the Assets feature, you are able to add an asset or assets found in inventory to the container from the Assets tab. This is an optional step.
Note: The role of the logged-in user must contain the Assets feature in order to add an asset to the container.
How to Add a Container
A container is added from the Add Container form. The steps below outline this process.
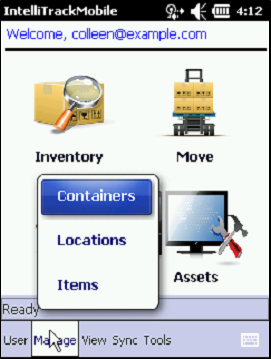
- Select Manage > Containers from the menu bar to reach the Manage Containers form.
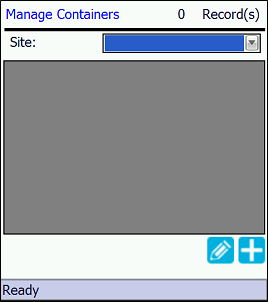
- At the Manage Containers form, select the
 Add icon.
- The Add Container form appears. The Container tab is to the front.
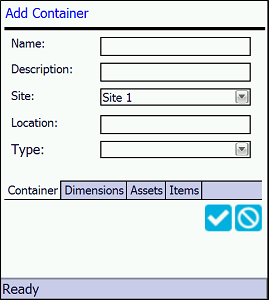
- Enter the following container information in the Container tab.
- Name field (required): enter the container name in this field.
- Description field (optional): enter the container description in this field.
- Site field (required): the default site of the logged-in user is automatically placed in this field. To select another site, tap the drop-down arrow to view the site options available to the logged-in user.
- Location field (required): enter the site-physical location in which the container resides in this field.
- Type field (required): tap the drop-down arrow to view the container type options. Select a container type for this container from the container type options available.
- This is all of the required information for adding a container. You may save the container at this point if you are not adding anything else to it; see "Saving the Container".
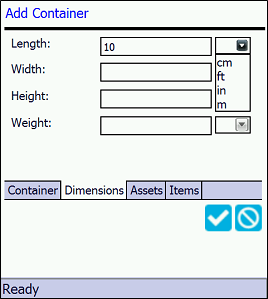
Dimensions Tab
You are able to enter the following dimensions for the container at the Dimensions tab: length, width, height, and weight at the Dimensions tab.
If you want to enter a dimension or dimensions for the container, follow the steps below.
- Tap the Dimensions tab to bring this portion of the form to the front.
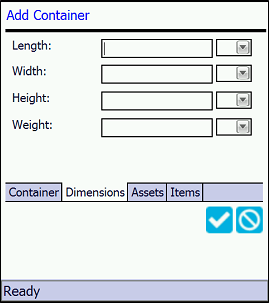
- Length (optional): enter a container length and select a measurement unit for it.
- cm: centimeter/centimeters
- ft: foot/feet
- in: inch/inches
- m: meter/meters
- Width (optional): enter a container width and select a measurement unit for it.
- cm: centimeter/centimeters
- ft: foot/feet
- in: inch/inches
- m: meter/meters
- Height (optional): enter a container height and select a measurement unit for it.
- cm: centimeter/centimeters
- ft: foot/feet
- in: inch/inches
- m: meter/meters
- Weight (optional): enter a container weight and select a measurement unit for it.
- g: gram/grams
- kg: kilogram/kilograms
- lb: pound/pounds
- oz: ounce/ounces

Assets Tab
Note: The role of the logged-in user must contain the Assets feature in order to add an asset to the container.
If the role of the logged-in user contains the Assets feature, you are able to add an asset or assets to the container from the Assets tab. In order to add an asset to the container, it must be found in asset inventory. When an asset is added to a container, an Asset Move to Container transaction occurs.
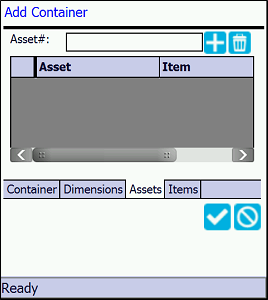
To add an asset to the container, follow the steps below.
- Tap the Assets tab to bring it to the front.
- To add an asset to the container, enter the asset in the Asset # field and tap the Add icon. Or scan the asset number in the Asset # field.
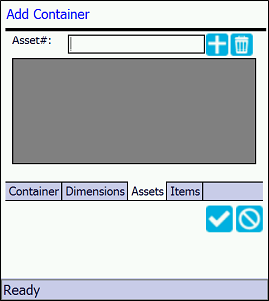
- If the asset is found in inventory, it is added to the container.
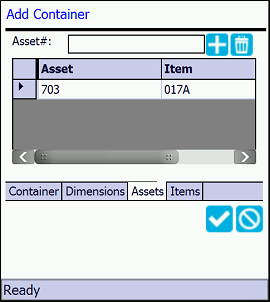
Deleting an Asset from the Asset Tab
Use the  Delete icon to remove the asset from the container.
- From the Assets tab, select the asset that you want to remove from the container.
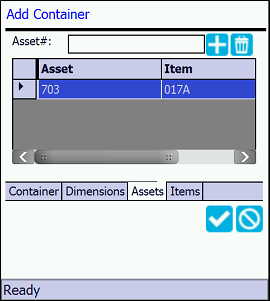
- Tap the Delete icon.
- A message appears: "Remove from container?."
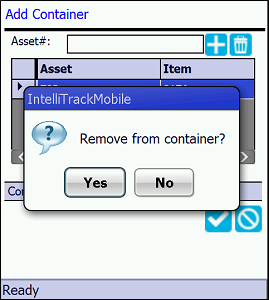
- If you do not want to remove the asset from the list, select No to close the message and return to the Assets tab; the asset will remain in the list.
- To remove the asset from the container, select Yes; the message closes and you are returned to the Assets tab. The asset has been removed from the asset list.
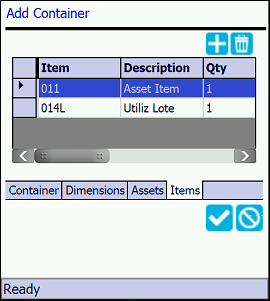
Items Tab
You are able to add an item or items to the container from the Add Item to Container form, which is reached from the Items tab. It uses a field Lock feature that enables you to lock a default value in a field. By locking a field, the field entry does not have to be continually re-entered during data entry. When an item is added to a container ,a Move to Container transaction occurs.
Note: In order to add an item to the container, the item must be found in inventory.
To add an item to the container, follow the steps below.
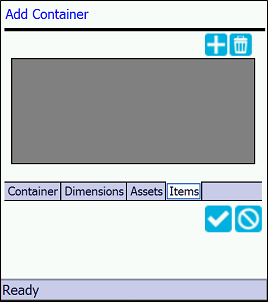
- Select the Items tab to bring it to the front.
- Tap the Add icon.
- The Add Item to Container form appears.
- Site field: the default site of the logged-in user is automatically placed in this field. If the user has access to another site and wants to add an item from this site to the container, the user may click the drop-down arrow in the Site field and select the site.
- Location field: enter or scan the site-location of the item in this field. If you will be issuing multiple items from this location, you have the option to lock the location so that you do not have to continually scan it. To lock the location, tap the
 Lock icon. The location will remain locked
  while items are being added to the container.
 - Item# field: enter or scan the item number in this field. If you are issuing this item from multiple locations, you have the option to lock the item so that you do not have to continually scan it. Tap the Lock icon to lock the item number. The item will remain locked while items are being added to the container.
- Qty field: enter or scan the amount of the item that is being added to the container in this field. If you are adding multiple items with this quantity, you have the option to lock the quantity. To lock the quantity, tap the Lock icon to the right of this field. The quantity will remain locked so that you do not have to continually scan it.
- Unit of Measure field: if the default division of the logged-in user uses multiple units of measure, enter or scan the unit of measure in this field. If you are adding multiple items with this unit of measure, you have the option to lock the unit of measure so that you do not have to continually scan it. To lock the unit of measure, tap the Lock icon to the right of this field; the unit of measure will remain locked.
- Serial Number field (if applicable): if this is a serial item, enter or scan the serial number in this field.
- Lot field (if applicable): if this is a lot item, enter or scan the lot in this field. If you are adding multiple items with this lot number, you have the option to lock the lot so that you do not have to continually scan it. To lock the Lot while scanning this item, tap the Lock icon to the right of this field; the lot will remain locked.
- Expiration Date field (if applicable): if this is an expiration date item, enter or scan the expiration date in this field. If you are adding multiple items with this expiration date, you have the option to lock this expiration date so that you do not have to continually scan it. To lock the Expiration Date while scanning this item, tap the Lock icon to the right of this field; the expiration date will remain locked.
- Save icon:
 click to add this item to the container. The form clears, indicating this item has been added to the container.
 - Continue scanning the items that are being added to this container.
- When you are finished adding items to this order, tap the
 Cancel icon. You are returned to the Add Container form\Items tab. The items have been added to this order.
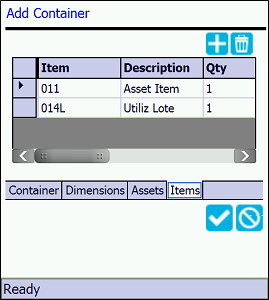
Deleting an Item from the Item Tab
If you add an item to the container and you want to remove it, use the Delete icon at the Items tab to remove the item from the container.
- From the Items tab, select the item that you want to remove from the container.
- Select the Delete icon.
- A message appears: "Remove from container?."
- If you do not want to remove this item from the container, select No to close the message and return to the Items tab; the item remains.
- If you want to remove this item from the container, select Yes to close the message and return to the Items tab; the item has been removed from the tab.

Saving the Container
When you have entered all of the container information, you are ready to save it to IntelliTrack. To save the container to IntelliTrack follow the steps below.
- To save the container to IntelliTrack, select the Save icon at the Add Container form.
- A message appears along the bottom of the form: Saving Container.
- When the container is saved to IntelliTrack, the Add Container form closes and you are returned to the Manage Containers form.
- IntelliTrack Mobile RF: the container is added to the main database when the Save icon is pressed.
- IntelliTrack Mobile Batch: the container is added to the main database after performing a data upload via the Sync > Upload menu. If you added items or assets to the container, they are added to the container when you process the Move To Container transactions into the main application at the Upload Processing page in the IntelliTrack web application (Portable > Batch Processing) after performing the data upload.
Note: For IntelliTrack Mobile Batch users: when adding a container via the batch application, we recommend performing a data upload after adding the container or containers so that they are integrated into the main IntelliTrack application. If the container contains assets or items, we then recommend processing the Move To Container transactions at the Upload Processing page in order to add the assets or items to the containers in the main IntelliTrack application.